GREE Platform SDK for Cocos2dx now supports iOS.
Hi everyone, I'm Kazuma from GREE. First of all, i'm sorry for the long blank since my previous article below.
http://labs.gree.jp/blog/2012/12/6846/
I was fortunate to have my article featured on the Cocos2d-x main project page.
http://www.cocos2d-x.org/news/91
As promised in my previous article, I have added iOS support to my library. So now you can use my GREE Platform SDK for Cocos2d-x on both Android and iOS with the same code.
In this article, I will describe how to develop a Cocos2d-x application for iOS that connects to the GREE Platform.
In addition, I will be introducing a new feature I added to my library, WebView plugin, that allows you to implement a platform independent webview from the Cocos2d-x context.
Integrate GREE Platform SDK with your Cocos2d-x game for iOS.
This guide provides step-by-step instructions on how to integrate GREE SNS features (User information, FriendList, Payment, and so on) with your Cocos2d-x applications for iOS.
Requirements
You should have Xcode installed on your machine.
Get GREE Platform SDK for iOS
The latest version of the GREE Platform SDK is available from:
https://developer.gree.net
https://developer.gree.net/en/
Please download the SDK for iOS.
You can also find a Developer’s Guide at the URL above with instructions on how to add libraries to develop general iOS applications with GREE SDK in Xcode.
Instructions in this article were performed using GREE SDK version v3-4-21.
To activate your GREE Application, you need to acquire a GREE Application Id, a GREE Consumer Key, a GREE Consumer Secret, and edit your source code such that these are properly configured for your application. I will describe how to do that further down in this article.
Get Cocos2d-x and GREE Platform SDK for Cocos2d-x
Get GREE Platform SDK for Cocos2d-x.
|
1 2 3 |
$git clone https://github.com/gree/GreePlatformSDKCocos2dx.git $cd GreePlatformSDKCocos2dx # top of the cloned directory $./setup.sh |
setup.sh downloads Cocos2d-x source code and adds GREE Platform SDK for Cocos2d-x to it. It also provides a sample application which connects to the GREE Platform.
Install template for Xcode
|
1 |
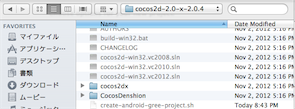
$cd cocos2dx-2.0-x-x.x.x |
Usually one would execute install-templates-xcode.sh to install Cocos2d-x templates for Xcode. This library however provides a install-gree-templates-xcode.sh file that installs GREE Platform SDK templates for Xcode.
Please execute it with sudo.
|
1 2 3 4 5 6 7 8 9 10 11 12 13 14 15 16 17 18 19 |
$sudo ./install-gree-templates-xcode.sh Password: cocos2d-x template installer including gree-extension cocos2d-x template installer Installing Xcode 4 cocos2d-x iOS template ---------------------------------------------------- templates already installed. To force a re-install use the '-f' parameter Installing Xcode 4 cocos2d-x gree_extension iOS template ---------------------------------------------------- ...copying gree extension files done! |
If successful, the template for gree_extension should now be installed under the "~/Library/Developer/Xcode/Templates/" directory.
Build your application
Select "Create a new Xcode project".
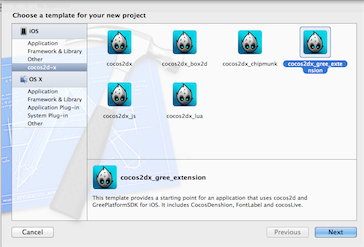
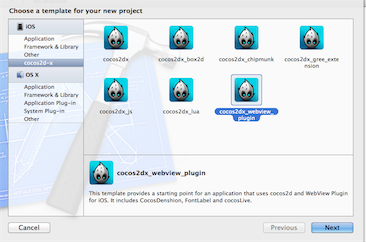
Select the "cocos2dx_gree_extension" template and click Next.
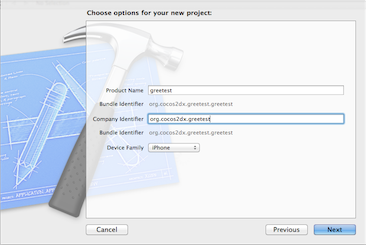
Fill in the Product name, Company Identifier and select Next.
Specify the location in which you wish to store the project to create, and select Create.
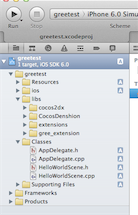
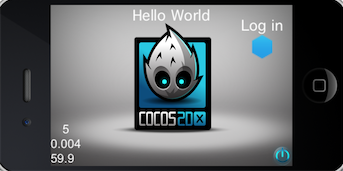
If everything went well, you now have a new cocos2d-x project for the GREE Platform.
Now you need to add GREE Platform SDK libraries into your project. Please refer to the Developer’s Guide I mentioned above for instructions on how to add them to your project.
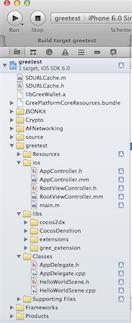
I shall skip the detailed instructions for that in this article. After adding the libraries your project tree should look like this:
Lastly, you have to set your GREE Application Id, Consumer Key, Consumer Secret in the init function of the "GreePlatformDispatcher.mm" file. This is the only part in which you are exposed to Objective-C code.
|
1 2 3 4 5 6 7 8 9 |
-(id)init { // Initialize GreePlatformSDK NSDictionary* settings = [NSDictionary dictionaryWithObjectsAndKeys : GreeDevelopmentModeSandbox, GreeSettingDevelopmentMode, nil]; [GreePlatform initializeWithApplicationId : @"xxxxx" consumerKey : @"xxxxxxxxxx" consumerSecret : @"xxxxxxxxxxxxxxxxxxxxxxxxxxxxxx" settings : settings delegate : self ]; return self; } |
You can now click "Run" to build and execute the application on simulator.
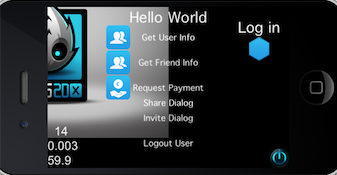
Currently, Authorizer(login/logout), People(User/Friends), Payment, ShareDialog, InviteDialog are supported, for which the same C++ APIs as Android can be used. Callbacks can also be handled with the same APIs.
ShareDialog API
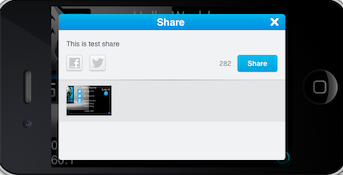
This is the ShareDialog API example included in the library (ShareDialog enables you to update images like ScreenShot on the server and share them with your friends).
|
1 2 3 4 5 6 7 8 9 10 11 12 13 14 15 16 17 18 19 20 21 22 23 24 25 26 27 |
// To enable ShareDialog callback CCGreePlatform::setShareDialogDelegate(this); // Capture Application ScreenShot CCSize size = CCDirector::sharedDirector()->getWinSize(); CCRenderTexture *tex = CCRenderTexture::renderTextureWithWidthAndHeight(size.width, size.height); tex->setPosition(ccp(size.width/2, size.height/2)); tex->begin(); this->visit(); tex->end(); CCImage *img = tex->newCCImage(); // Code for launching a ShareDialog CCGreeShareDialog *dialog = CCGreeShareDialog::create(); CCDictionary *dict = CCDictionary::create(); dict->setObject(new CCString("This is test share"), GD_SHARE_DIALOG_PARAM_KEY_MESSAGE); dict->setObject(img, GD_SHARE_DIALOG_PARAM_KEY_IMG); dialog->setParams(dict); dialog->show(); //Callbacks void HelloWorld::shareDialogOpened(CCGreeShareDialog *dialog){ } void HelloWorld::shareDialogCompleted(CCGreeShareDialog *dialog, CCArray *userArray){ } void HelloWorld::shareDialogClosed(CCGreeShareDialog *dialog){ } |
As you may have noticed, for this case the iOS version requires less steps than the Android version to accomplish the same task.
WebView Plugin
I shall now talk about the new WebView plugin I added to GREE Platform SDK for Cocos2dx.
With this new plugin, you can now use WebView on both Android and iOS with the same Cocos2d-x code.
You can specify whether to use both GREE Platform features or just the WebView plugin with setup.sh.
|
1 2 |
$./setup.sh -m all # prepare both of GREE Platform SDK and WebView plugin $./setup.sh -m webview # only setup WebView plugin |
Install the WebView plugin template for Xcode with the install-webview-templates-xcode.sh file.
|
1 |
$ sudo ./install-webview-templates-xcode.sh |
This should add a new cocos2dx_webview_plugin template that you can select from Xcode.
After creating the project, click Run to build and execute the application.
The Cocos2d-x webpage should be displayed.
Using it is simple:
|
1 2 3 4 5 |
//CCWebView Test pWebView = CCWebView::create(); pWebView->setRect(100, 100, size.width - 110, size.height - 20); pWebView->setVisibility(true); pWebView->loadUrl("http://www.cocos2d-x.org/"); |
This example is on iOS, but you can achieve the same result in Android with the same code.
Summary
Cross platform support is one of the key features of Cocos2d-x. With Cocos2d-x, you can build applications for different platforms (e.g. Android, iOS), and also integrate GREE Platform support for your application with a single codebase.
I hope this article invoked enough interest in you to motivate you to try it out for yourself.
Thanks a lot for reading.

