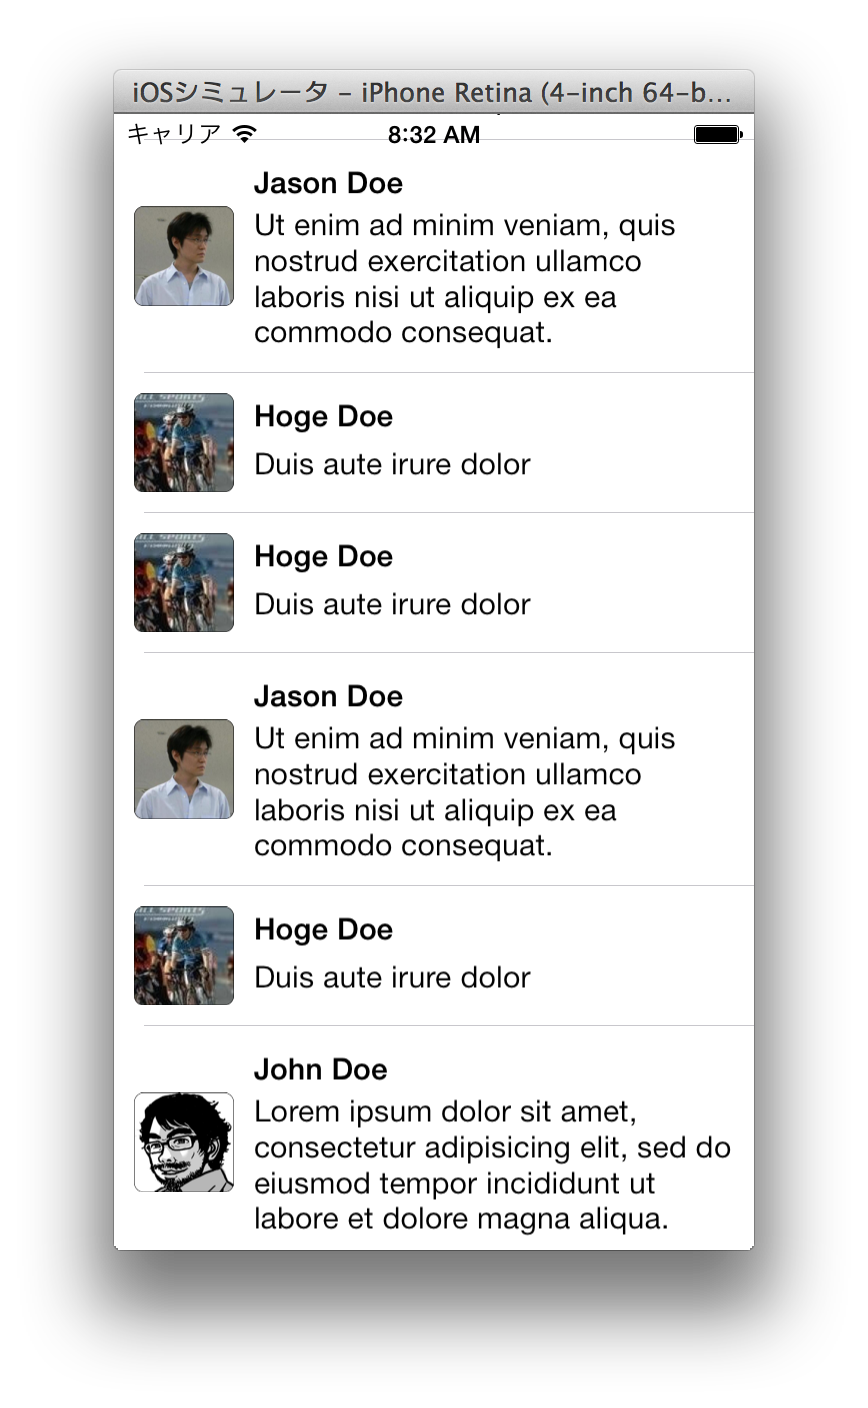
なめらかに動作するUITableViewのつくりかた
矢口裕也です。
Advent Calendar 10日目はiOSのUITableViewの話をします。
ぼやき
iOSアプリを開発していると70%くらいの時間はUITableViewに費やしている気がしてきます。
UITableViewは非常にめんどうなものですが、パフォーマンスがシビアでかつユーザーの快適さに直結するものなので大いに手間をかける価値があります。
この記事ではガクガク処理落ちするUITableViewを例として改善していきながら快適なUITableViewのつくりかたを解説します。
目的
以下のケーススタディでは次の目的でコードを改善していきます
- なめらかに動くようにする
ここでのポイントは実際速くなくてもユーザが快適に感じればOKである、ということです。処理速度が高速である必要はありません。
戦略
UITableViewでのパフォーマンス問題は次の2点であることが多いです
- スクロールがガクつく
- loadMoreで0.5〜数秒固まる
スクロールがガクつく
これはcellForRowAtIndexPath:の実行に時間がかかっていること、または描画自体が重いことのいずれかが原因です。
前者についてはcellForRowAtIndexPath:はメインスレッドで実行されるため、処理に時間がかかるとその間、画面の更新が止まってしまい、スクロールがガクガクしてしまいます。メソッドの実行時間を短くすることで改善することができます。
後者については、画像のリサイズ、角丸など重い描画時加工を行わないこと、ブレンドレイヤーを減らすことで改善できますできます。
loadMoreで0.5〜数秒固まる
これは多くの場合、cellのinsert, delete, reloadで呼ばれるtableView:heightForRowAtIndexPath:の実行に時間がかかっていることが原因です。
tableView:heightForRowAtIndexPath:はメインスレッドで実行されるため、処理に時間がかかるとその間、画面の更新と操作の受付が止まってしまい、ユーザーにフリーズしたような感覚を与えてしまいます。
メソッドの実行時間を短くすることで改善することができます。
用意するもの
- なるべく遅いiOS端末
速い端末ではチューニングの効果が確認しにくいです。少なくともメインターゲットとしている端末の1世代前のものを用意しましょう。iOS7であればiPhone4あたりがおすすめです。
効果の測定方法
遅い端末でアプリを触って確かめます。
快適っぽく感じたら効果があったと考えてよいでしょう。
逆に遅い端末で効果がよくわからないチューニングは効果がないと考えていいでしょう。数字は参考程度でフィーリングを大切に。
サンプルアプリ
例として何かのコメントを表示するアプリを考えてみます
ソースコードはこちらです:
https://github.com/yayugu/UITableViewExamples
slowExampleの方を動かしていただければわかりますが、非常に重く、AppStoreのレビューで「重すぎなので ☆1つ」と書かれそうなクオリティーになっています。これを改善していきます。
通信は必ずasynchronousで行う
当たり前のことかと思われるかもしれませんが、特に不慣れな方が書いたコードで何度か同期通信を行っているコードを見たことがあります。通信は必ず非同期で行うようにしましょう。
JSONの読み込みを非同期に
https://github.com/yayugu/UITableViewExamples/commit/8662980566de2048ce898643741fa203c1cb57ed
ViewControllers/YYTableViewController.m
before
|
1 2 3 4 5 6 7 8 9 10 11 12 13 14 15 16 17 18 19 20 21 22 23 |
<ul> <li> (void)viewDidLoad</li> </ul> { [super viewDidLoad]; _commentList = [[YYCommentList alloc] initWithDelegate:nil]; [_commentList requestSynchronous]; } <ul> <li> (void)scrollViewDidScroll:(UIScrollView *)scrollView</li> </ul> { CGFloat contentOffsetWidthWindow = self.tableView.contentOffset.y + self.tableView.bounds.size.height; BOOL leachToBottom = contentOffsetWidthWindow >= self.tableView.contentSize.height; if (!leachToBottom) return; [self.indicator startAnimating]; [self.commentList requestMoreSynchronous]; [self.indicator stopAnimating]; } |
after
|
1 2 3 4 5 6 7 8 9 10 11 12 13 14 15 16 17 18 19 20 21 22 23 24 25 26 27 28 29 30 31 32 33 |
<ul> <li> (void)viewDidLoad</li> </ul> { [super viewDidLoad]; _commentList = [[YYCommentList alloc] initWithDelegate:self]; [_commentList requestAsynchronous]; } <ul> <li> (void)scrollViewDidScroll:(UIScrollView *)scrollView</li> </ul> { CGFloat contentOffsetWidthWindow = self.tableView.contentOffset.y + self.tableView.bounds.size.height; BOOL leachToBottom = contentOffsetWidthWindow >= self.tableView.contentSize.height; if (!leachToBottom || _commentList.loading) return; [_indicator startAnimating]; [_commentList requestMoreAsynchronous]; } #pragma mark - Comment List delegate <ul> <li> (void)commentListDidLoad</li> </ul> { [_indicator stopAnimating]; [self.tableView reloadData]; } |
画像の読み込みを非同期に
https://github.com/yayugu/UITableViewExamples/commit/c70b863ce864a715a7019da83b226bd7817d2f1c
Views/YYCommentCell.m
|
1 2 3 4 5 6 7 8 9 10 11 12 13 14 |
- (void)setComment:(YYComment *)comment { _comment = comment; _name.text = comment.name; _commentText.text = comment.text; <ul> <li> _icon.image = [YYImageLoader imageWithURL:comment.iconURL];</li> <li> [YYImageLoader imageWithURL:comment.iconURL completion:^(UIImage *image, NSError *error) {</li> <li> if (error) return;</li> <li> _icon.image = image;</li> <li> }];</li> </ul> } |
画像は別スレッドでリサイズ&角丸化してからメインスレッドに持ってくる
以下のようなUIImageViewはパフォーマンスを低下させてしまう場合があります。
- 表示するサイズと画像のサイズが一致していない
- CALayerで角丸にしている
- 透過を使用している
これらの問題は別スレッドでUIImageを加工することで対応できます。
今回の例では
- リサイズ
- 白背景塗りつぶし
- 角丸
- 枠線
の処理を行ったUIImageを作成するようにしました
画像加工のコードについては長くなるのでコミットログを参照してください。
https://github.com/yayugu/UITableViewExamples/commit/c92b9b368bd0b817283612d6116e9ab06ed93944
CommentCellのコードは以下のようになり、CALayerのborderWidth, cornerRadiusを指定する箇所が削られます。
|
1 2 3 4 5 6 7 8 9 10 11 12 13 14 15 16 17 18 19 20 21 22 23 24 25 26 27 28 29 30 31 32 33 34 35 36 |
@implementation YYCommentCell <ul> <li> <ul> <li> (void)awakeFromNib</li> </ul> </li> <li>{</li> <li> _icon.layer.borderWidth = 1.0;</li> <li> _icon.layer.cornerRadius = 5.0;</li> <li>}</li> <li></li> </ul> ... <ul> <li> (void)setComment:(YYComment *)comment</li> </ul> { _comment = comment; _name.text = comment.name; _commentText.text = comment.text; <ul> <li> [YYImageLoader imageWithURL:comment.iconURL completion:^(UIImage *image, NSError *error) {</li> <li> [YYImageLoader commentCellImageWithURL:comment.iconURL completion:^(UIImage *image, NSError *error) {</li> </ul> if (error) return; _icon.image = image; }]; } |
cell height計算には専用のLayoutクラスを使用し、UIViewを使用しないようにする
UITableViewCellでは全てのcellの高さは追加時に計算される必要があります。iOS7からはestimateHeight系のプロパティ指定/メソッド定義により正確な高さの計算をスクロール時まで遅延させることができるようになりましたが、いずれにせよcellForRowAtIndexPath:よりも前に高さが決定される必要があります。
サンプルプログラムではcellに値をassignし、UIViewのsystemLayoutSizeFittingSize:を利用してAutoLayoutで計算された高さを取得しています。
|
1 2 3 4 5 6 7 8 9 10 |
<ul> <li> (CGFloat)tableView:(UITableView *)tableView heightForRowAtIndexPath:(NSIndexPath *)indexPath</li> </ul> { YYCommentCell *cell = [tableView dequeueReusableCellWithIdentifier:@"Cell"]; cell.comment = [_commentList commentAtIndex:indexPath.row]; CGSize size = [cell.contentView systemLayoutSizeFittingSize:UILayoutFittingCompressedSize]; return size.height; } |
これはコードの重複がなく簡潔に書ける方法ですが非常に遅いです。
下のようにlayout専用クラスを作成し高さの計算を自分で記述することで大幅に高速化でき、loadMore時のフリーズがなくなります。
|
1 2 3 4 5 6 7 8 |
<ul> <li> (CGFloat)tableView:(UITableView *)tableView heightForRowAtIndexPath:(NSIndexPath *)indexPath</li> </ul> { YYComment *comment = [_commentList commentAtIndex:indexPath.row]; return [[YYCommentCellLayout alloc] initWithComment:comment cellWidth:self.view.bounds.size.width].height; } |
Layouts/YYCommentCellLayout.h
|
1 2 3 4 5 6 7 8 9 10 11 12 13 14 15 |
#import <UIKit/UIKit.h> @class YYComment; @interface YYCommentCellLayout : NSObject <ul> <li> (instancetype)initWithComment:(YYComment*)comment cellWidth:(CGFloat)cellWidth;</li> <li> (CGFloat)height;</li> <li> (CGRect)nameRect;</li> <li> (CGRect)commentTextRect;</li> </ul> @end |
Layouts/YYCommentCellLayout.m
|
1 2 3 4 5 6 7 8 9 10 11 12 13 14 15 16 17 18 19 20 21 22 23 24 25 26 27 28 29 30 31 32 33 34 35 36 37 38 39 40 41 42 43 44 45 46 47 48 49 50 51 52 53 54 55 56 57 58 59 60 61 62 63 64 65 66 67 68 69 70 71 72 73 74 75 76 77 78 79 80 81 82 83 84 85 86 87 88 89 90 91 92 93 94 95 96 97 |
#import "YYCommentCellLayout.h" #import "YYComment.h" static const CGFloat YYCommentCellLayoutHeightMinimum = 70; static const CGFloat YYCommentCellLayoutTopPadding = 10; static const CGFloat YYCommentCellLayoutBottomPadding = 10; static const CGFloat YYCommentCellLayoutNameCommentTextMargin = 10; static const CGFloat YYCommentCellLayoutTextLeftPadding = 70; static const CGFloat YYCommentCellLayoutTextRightPadding = 10; @interface YYCommentCellLayout () @property (nonatomic, strong) YYComment *comment; @property (nonatomic) CGFloat cellWidth; @end @implementation YYCommentCellLayout <ul> <li> (instancetype)initWithComment:(YYComment*)comment cellWidth:(CGFloat)cellWidth</li> </ul> { self = [super init]; if (self) { _comment = comment; _cellWidth = cellWidth; } return self; } <ul> <li> (CGFloat)height</li> </ul> { CGFloat calculateHeight = YYCommentCellLayoutTopPadding + [self nameSize].height + YYCommentCellLayoutNameCommentTextMargin + [self commentTextSize].height + YYCommentCellLayoutBottomPadding; return MAX(calculateHeight, YYCommentCellLayoutHeightMinimum); } <ul> <li> (CGRect)nameRect</li> </ul> { return (CGRect) { .origin.x = YYCommentCellLayoutTextLeftPadding, .origin.y = YYCommentCellLayoutTopPadding, .size = [self nameSize], }; } <ul> <li> (CGRect)commentTextRect</li> </ul> { return (CGRect) { .origin.x = YYCommentCellLayoutTextLeftPadding, .origin.y = YYCommentCellLayoutTopPadding + [self nameSize].height + YYCommentCellLayoutNameCommentTextMargin, .size = [self commentTextSize], }; } # pragma mark - Internals <ul> <li> (CGSize)nameSize</li> </ul> { return (CGSize) { .width = _cellWidth - YYCommentCellLayoutTextLeftPadding - YYCommentCellLayoutTextRightPadding, .height = 15.0, }; } <ul> <li> (CGSize)commentTextSize</li> </ul> { CGSize sizeMax = (CGSize) { .width = _cellWidth - YYCommentCellLayoutTextLeftPadding - YYCommentCellLayoutTextRightPadding, .height = CGFLOAT_MAX, }; NSDictionary *attr = @{NSFontAttributeName: [UIFont boldSystemFontOfSize:15.0]}; return [_comment.text boundingRectWithSize:sizeMax options:NSStringDrawingUsesLineFragmentOrigin attributes:attr context:nil].size; } @end |
今回やらなかったこと
- 加工した画像のキャッシュ
viewのなめらかさには直接影響しないため行いませんでしたが、実際のアプリケーションでは行ったほうがよいでしょう。
- cell height計算を別スレッドで行いキャッシュ
今回は行わなくても十分なパフォーマンスが得られたため行いませんでした。より複雑なlayout, 大量のcellの追加などでcellの追加が重くなる場合には行ったほうがよいでしょう。
まとめ
- main threadを極力ロックしないようにする
- heightForRowAtIndexPath, cellForRowAtIndexPathを高速にする
- blend layerを極力排除する
- 画像の加工を行わない
めんどうな作業ですが、こういった改善の積み重ねがネイティブでしか実現できない気持ちいいアプリをつくるのです!
明日はkyo_agoさんです。

