Integrate GREE Platform SDK into your cocos2dx game for Android
Hi everyone, I'm kazuma from GREE. I have a strong interest in cross-platform development tools that allow developers to write code once and deploy to multiple platforms.
Integrate GREE Platform SDK into your cocos2dx game for Android (will support iOS in the future)
This guide provides step-by-step instructions on how to integrate GREE SNS features (User information, FriendList, Payment, Achievement, Leaderboard and so on) with your cocos2dx applications.
This article is a little bit lengthy, but I hope it will be interesting for you, and inspire you to try it out yourself.
Requirements
You should have Eclipse with the Android Developer Tools installed. If not, please setup your environment with the instructions at:
http://developer.android.com/sdk/installing/installing-adt.html
Get GREE Platform SDK for Android
The latest version of the GREE Platform SDK is available from:
https://developer.gree.net
https://developer.gree.net/en/
Please download the SDK for Android. Instructions in this article are written for GREE SDK version v3-3-8.
You can also find a Developer's Guide at the URL above. Please follow the instructions in the guide and import the SDK into Eclipse.
To activate your GREE Application, you need a GREE Application Id, Consumer Key, Consumer Secret, and edit your config files so that they are properly set. I will show you how to do that later in this guide.
Detailed instructions can also be found in the Developer's Guide at the URL above.
Get AndroidNDK
Cocos2dx is written in C++ and needs to be built with AndroidNDK.
AndroidNDK is available from:
http://developer.android.com/tools/sdk/ndk/index.html
Please download and extract it to the proper location on your machine.
Get Cocos2d-x and GREE Platform SDK for Cocos2d-x
Now that you've finished setting up the basic environment for developing a cocos2dx application, its time to start building it. Get GREE Platform SDK for Cocos2d-x.
|
1 2 3 |
$git clone https://github.com/gree/GreePlatformSDKCocos2dx.git $cd GreePlatformSDKCocos2dx # top of the cloned directory $./setup.sh |
setup.sh downloads cocos2dx source code and adds GREE Platform SDK for Cocos2d-x code to it. It also provides a sample application which connects to the GREE Platform.
Create a cocos2dx project
|
1 |
$cd cocos2dx-2.0-x-x.x.x |
Normally you would create a cocos2dx application project with create-android-project.sh. With this binding however, we shall use create-android-gree-project.sh to create a cocos2dx application that connects to the GREE Platform. create-android-gree-project.sh requires both Android NDK and Android SDK, so you need specify their paths for the script to execute properly. You can directly modify create-android-gree-project.sh, or set their paths as as environmental variables.
|
1 |
$export NDK_ROOT=/home/hoge/xxxx; export ANDROID_SDK_ROOT=/home/hoge/....; ./create-android-gree-project.sh |
You will get a couple of prompts. Please provide values for the fields requested.
"Name of package"
"API version your app support"
"Project name of your app"
|
1 2 3 4 5 6 7 8 9 10 11 12 13 14 15 16 17 18 19 20 21 22 23 24 25 26 27 |
use global definition of NDK_ROOT: /Users/hoge/Work/android-ndk-r8b/ use global definition of ANDROID_SDK_ROOT: /Users/hoge/Work/android-sdk-macosx/ Input package path. For example: org.cocos2dx.example org.cocos2dx.greetest Now cocos2d-x supports Android 2.2 or upper version Available Android targets: ---------- id: 1 or "android-12" Name: Android 3.1 Type: Platform API level: 12 Revision: 3 Skins: WXGA (default) ABIs : armeabi ---------- . . . ---------- input target id: 1 input your project name: greetest Created project directory: /Users/hoge/Work/GreePlatformSDKCocos2dx/cocos2d-2.0-x-2.0.4/greetest/proj.android . . . Resolved location of library project to: /Users/hoge/Work/GreePlatformSDKCocos2dx/cocos2d-2.0-x-2.0.4/cocos2dx/platform/android/java Updated project.properties Updated local.properties Updated file /Users/hoge/Work/GreePlatformSDKCocos2dx/cocos2d-2.0-x-2.0.4/greetest/proj.android/proguard-project.txt |
Now you have a cocos2dx sample application that connects to the GREE Platform.
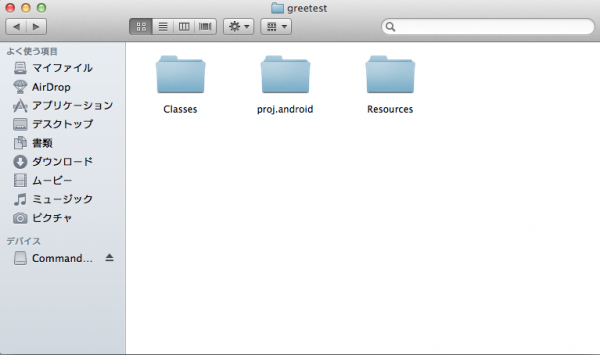
Build the project
Add the project
Launch Eclipse, and add the created project and cocos2dx java files.
File -> New -> Others
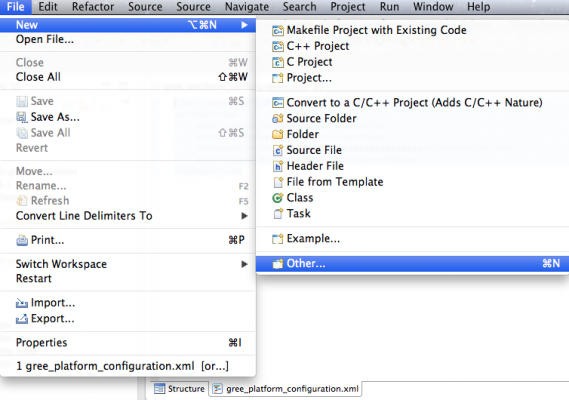
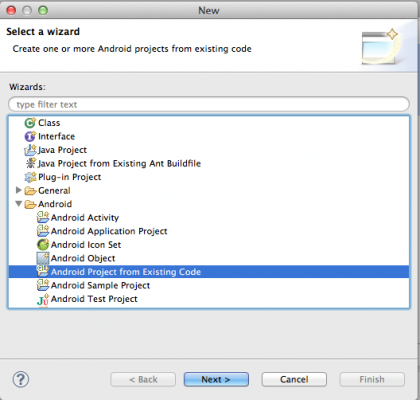
Select Android -> Android Project from Existing Code.
Select the "proc.android" directory of the created project.
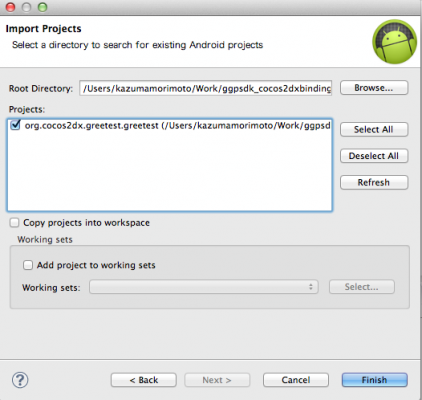
Select the "./cocos2dx/platform/android/java" directory under cocos2dx source code.
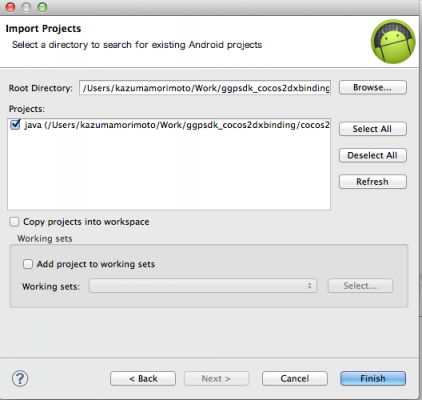
Project Setup
From the project explorer window, choose "java" project and select Properties. Set GreeSDK as reference library.
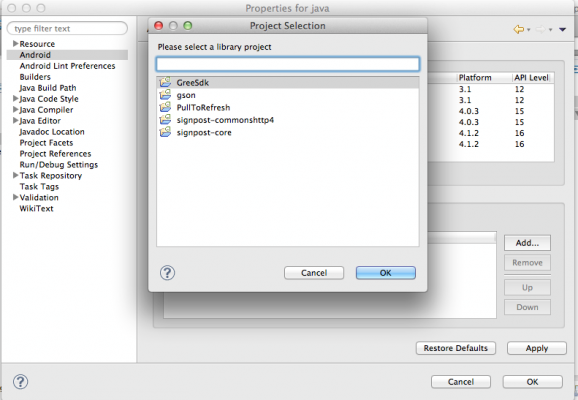
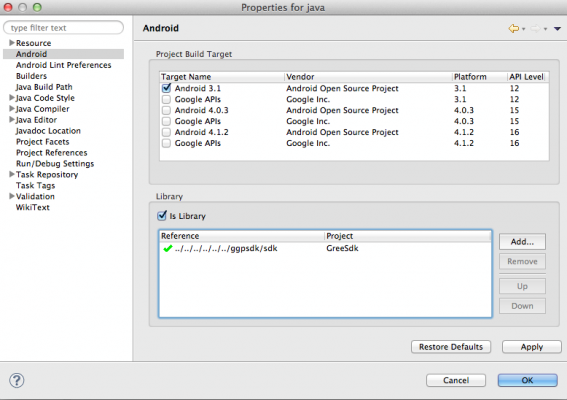
Now you should have no errors with java. Next, you have to configure the build environment for native code.
Configure the build environment for native code
(You can skip this step if you are going to build native code with the command line)
To build native code on Eclipse, you have to install CDT for Eclipse.
Select Help -> Install New Software.... from the main menu, and select http://download.eclipse.org/releases/xxxxx, check "C/C++ Development Tools", and install it.
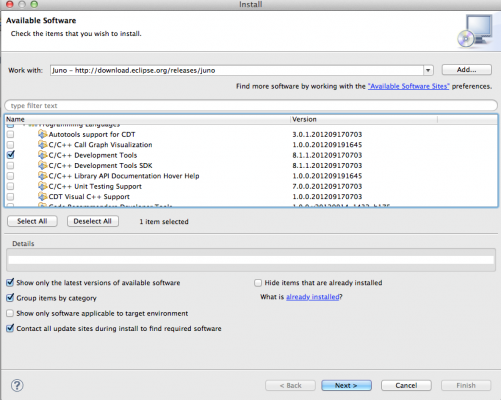
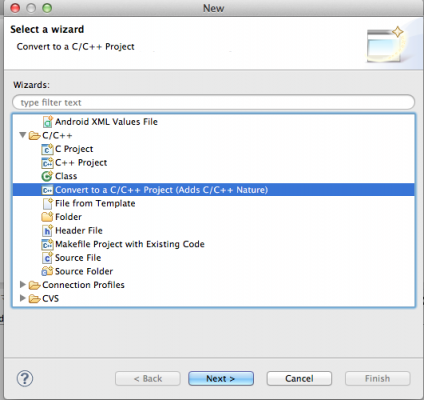
Select File -> New -> Others and select C/C++ -> Convert to a C/C++ Project (Adds C/C++ Nature)
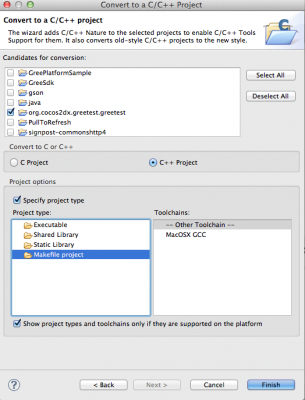
Check the project you created, and select the Makefile project from the Project type window.
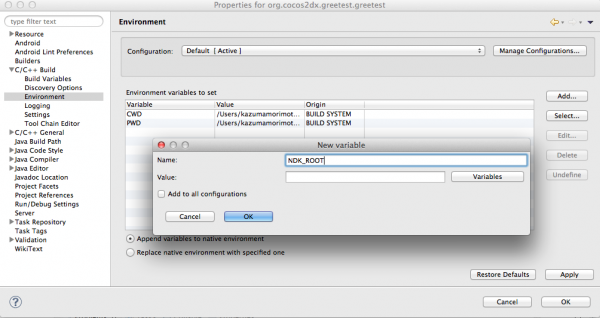
From the Project Explorer window, select your project -> Properties.
Select C/C++Build -> Environment and add NDK_ROOT environment variable.
Select C/C++Build, uncheck Use default build command and set "bash < path of the build_native.sh on your machine >"
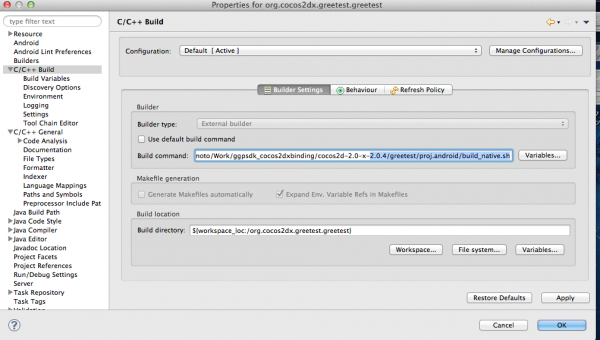
The steps above need to be done only once for each project.
Now, you can build your native code with the button below.
![]()
Set information required for GREE Platform
Set your Application Id, Consumer Key, and Consumer Secret in res/xml/gree_platform_configuration.xml.
|
1 2 3 |
<applicationId>xxxxx<applicationId> <consumerKey>xxxxxxxxxxxxxxxxxxxxxxxxxxxxxxx</consumerKey> <consumerSecret>xxxxxxxxxxxxxxxxxxxxxxxxxxxxxx</consumerSecret> |
Also replace "xxxxx" in AndroidManifest.xml with your Application Id.
|
1 2 |
<android:scheme="greeappxxxxx"> <android:scheme="greeappopenxxxxxx"> |
These steps are the same as the steps performed when creating an android application for the GREE platform.
Launch Application
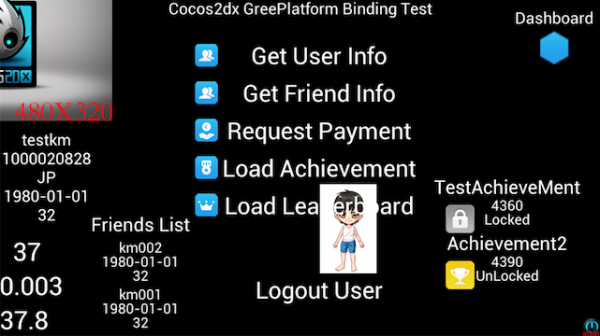
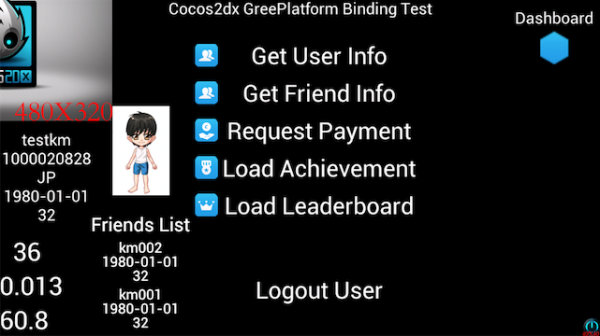
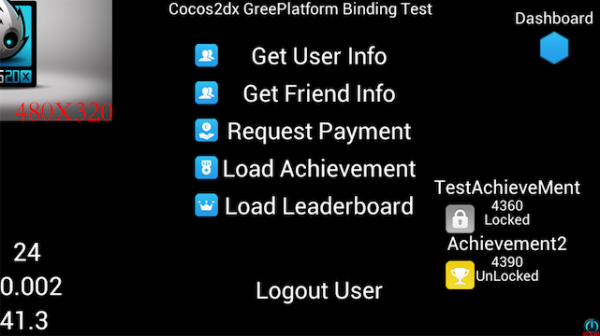
Your are now ready to run the application. It should show up like this:
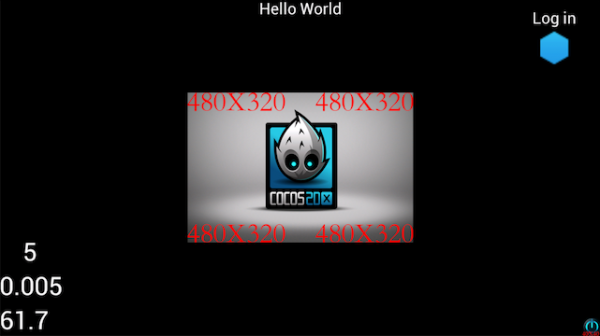
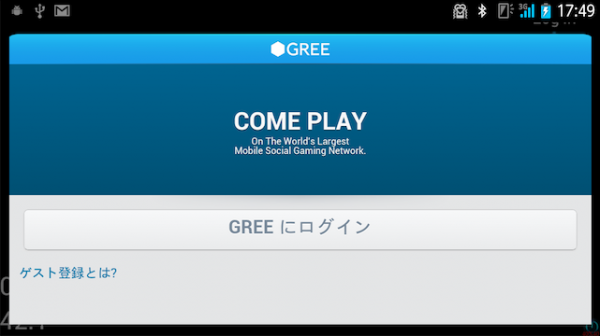
You can log in to GREE Platform by clicking on the icon in the top right corner.
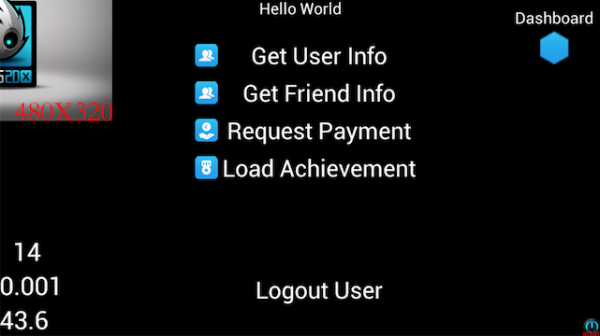
The default sample app, "GreeBasicSample", includes Authorizer, Dashboard, User, Friends, Payment, Achievement, Leaderboard APIs.
How to use each API
General
To use GREE Platform SDK extensions,
|
1 2 3 |
#include "cocos-gree-ext.h" USING_NS_CC_GREE_EXT; .... |
Callbacks
GREE Platform SDK uses callbacks for several APIs. To implement them, please inherit CCGreePlatformDelegate class. In the default sample:
|
1 |
class Helloworld : public cocos2dx::gree_extension::CCGreePlatformDelegate { |
Next, call the setDelegatexxxx method, and implement callback method to be called.
If you'd like to catch authorizeAuthorized, authorizeError, and authorizeCancel callbacks of the Authorizer APIs -- authorizeAuthorized, authorizeCancel, authorizeError --. please override them in HelloWorld.h.
|
1 2 3 |
virtual void authorizeAuthorized(); virtual void authorizeError(); virtual void authorizeCancel(); |
If you don't need to handle a specific callback, you don't have to implement it. (for example, it is okay to leave the authorizeCancel method without implementing it, if you don't need to catch the cancel callback)
In HelloWorld.cpp:
|
1 2 3 4 5 6 7 8 |
xxxxx { CCGreePlatform::setAuthorizerDelegate(this); } void HelloWorld::authorizeAuthorized(){ } void HelloWorld::authorizeError(){ } |
The available callbacks are shown in the corresponding CCGreeXXXXDelegate class in each CCGreeXXXX.h file. For example, if you'd like to get loadThumbnail callback, the prototype of the method is:
|
1 |
virtual void loadThumbnailSuccess(CCGreeUser *user, CCImge *img) |
This callback returns thumbnail data as a CCImage. You can use it for example in the following way:
|
1 2 |
CCTexture2D *tex = CCTextureCache::sharedTextureCache()->addUIImage(img, "key_name"); CCSprite *icon = CCSptite::spriteWithTexture(tex); |
You can do anything with it as you could with a sprite; draw, move, scale and so on.
Note: Callbacks don't run on the UI thread, so you cannot perform draws in callbacks.
Authorizer API
The basic usage of the Authorizer API is:
|
1 2 3 4 5 6 7 8 9 10 11 12 13 14 |
xxxxx{ CCGreePlatform::setAuthorizerDelegate(this); if(CCGreeAuthorizer::isAuthorized() != true){ CCGreeAuthorizer::authorize(); } } //To get Callbacks void HelloWorld::authorizeAuthorized(){ } void HelloWorld::authorizeError(){ } void HelloWorld::authorizeCancel(){ } |
If you'd like to log out, call the logout method:
|
1 2 3 4 5 6 7 8 9 10 11 |
xxxxx{ CCGreeAuthorizer::logout(); } // To get Callbacks void HelloWorld::logoutLogouted(){ } void HelloWorld::logoutError(){ } void HelloWorld::logoutCancel(){ } |
You can also get Authorizer related information.
|
1 2 |
CCString *token = CCGreeAuthorizer::getOAuthAccessToken(); CCString *secret = CCGreeAuthorizer::getOAuthAccessTokenSecret(); |
Currently supported APIs are:
|
1 2 3 4 5 6 7 8 9 10 11 12 |
class CCGreeAuthorizer { public: static void authorize(); // async static void authorize(int user_grade); // async static bool isAuthorized(); static bool hasOAuthAccessToken(); static CCString *getOAuthAccessToken(); static CCString *getOAuthAccessTokenSecret(); static void logout(); // async } |
User and Friend APIs
With User and Friend APIs, you can get user information (e.g. name, age, gender and so on) of users, as well their friends' information.
To get login user information:
|
1 2 3 4 5 6 7 8 9 10 11 12 13 14 15 16 17 |
CCGreeUser *user = CCGreePlatform::getLocalUser(); CCString *nickName = user->getNickname(); CCString *dispName = user->getDisplayName(); CCString *id = user->getId(); CCString *region = user->getRegion(); CCString *subRegion = user->getSubregion(); CCString *lang = user->getLanguage(); CCString *timeZone = user->getTimezone(); CCString *me = user->getAboutMe(); CCString *birthDay = user->getBirthday(); CCString *gender = user->getGender(); CCString *age = user->getAge(); CCString *blood = user->getBloodType(); bool hasApp = user->getHasApp(); CCString *hash = user->getUserHash(); CCString *type = user->getUserType(); int grade = user->getUserGrade(); |
To load the user's avatar thumbnail:
|
1 2 3 |
user->loadThumbnail(THUMBNAIL_SIZE_HUGE); // you can specify the size of the thumbnail to be downloaded. //Refer to the information regarding thumbnail callbacks to handle the response. |
To get a list of friends:
|
1 2 3 4 5 6 7 8 |
user->loadFriends(1, 10); //first argument specifies the startIndex, second argument specifies the number of friends to load. // Callbacks for loadFriends void HelloWorld::loadFriendsSuccess(CCGreeUser *user, int index, int count, CCArray *userArray){ } void HelloWorld::loadFriendsFailure(CCGreeUser *user, int responseCode, CCString *response){ } // Friends information retrieved will be stored in a CCArray which can be easily iterated over. |
Currently supported APIs are:
|
1 2 3 4 5 6 7 8 9 10 11 12 13 14 15 16 17 18 19 20 21 22 23 24 25 |
class CC_DLL CCGreeUser : public CCObject { public: CCString *getNickname(); CCString *getDisplayName(); CCString *getId(); CCString *getRegion(); CCString *getSubregion(); CCString *getLanguage(); CCString *getTimezone(); CCString *getAboutMe(); CCString *getBirthday(); CCString *getGender(); CCString *getAge(); CCString *getBloodType(); bool getHasApp(); CCString *getUserHash(); CCString *getUserType(); int getUserGrade(); bool loadThumbnail(int size); // async void loadFriends(int offset, int count); // async void loadIgnoredUserIds(int offset, int count); //async void isIgnoringUserWithId(CCString *pid); //async } |
Payment APIs
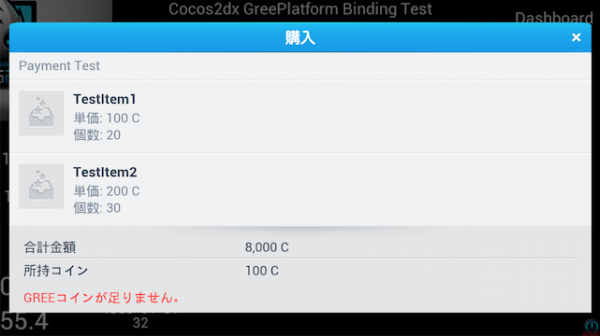
You can create Payment items and submit Payment requests. To submit a Payment request, you have to create Payment Items first, and specify them in the request.
|
1 2 3 4 5 6 7 8 9 10 11 12 13 14 15 16 17 18 19 20 21 22 23 24 |
CCGreePaymentItem *item1 = CCGreePaymentItem::create("01234", "TestItem1", 100, 20); CCGreePaymentItem *item2 = CCGreePaymentItem::create("56789", "TestItem2", 200, 30); // arg1 : itemId, arg2 : itemName, arg3 : unitPrice, arg4 : quantity CCArray *itemArray = new CCArray(); itemArray->addObject(item1); itemArray->addObject(item2); // to enable callbacks CCGreePlatform::setPaymentDelegate(this); CCGreePayment *pay = CCGreePayment::create("Payment Test", itemArray); // arg1 : message to be displayed on payment screen pay->request(); } // Callbacks void HelloWorld::paymentRequestSuccess(CCGreePayment *payment, int responseCode, CCString* paymentId){ } void HelloWorld::paymentRequestCancel(CCGreePayment *payment, int responseCode, CCString* paymentId){ } void HelloWorld::paymentRequestFailure(CCGreePayment *payment, int responseCode, CCString *paymentId, CCString *response){ } |
Implement callback methods as required.
Currently supported APIs are:
|
1 2 3 4 5 6 7 8 9 10 11 12 13 14 15 16 17 18 19 20 21 |
class CCGreePaymentItem : public CCObject { public: void setImageUrl(const char *url); void setDescription(const char *desc); CCString *getItemId(); CCString *getItemName(); double getUnitPrice(); int getQuantity(); CCString *getImageUrl(); CCString *getDescription(); } class CCGreePayment { public: void request(); // async void setCallbackUrl(const char *url); void verify(const char *paymentId); // async } |
Achievement APIs
You can load a list of Achievements:
|
1 2 3 4 5 |
// to get callback CCGreePlatform::setAchievementDelegate(this); CCGreeAchievement::loadAchievements(1, 10); // arg1 : start index to be loaded, arg2 : the number of the list to be loaded |
Get the achievement list by implementing the success callback.
As with the friends list, achievement items retrieved are stored in a CCArray.
|
1 2 3 4 5 6 7 8 |
void HelloWorld::loadAchievementsSuccess(int index, int count, CCArray *elementArray) { CCObject *it; CCARRAY_FOREACH(elementArray, it){ CCGreeAchievement *element = dynamic_cast<CCGreeAchievement *>(it); } } } |
You can lock/unlock the achievements:
|
1 2 3 4 5 |
if(element->isUnlocked() == true){ element->lock(); }else{ element->unlock(); } |
And get the corresponding lock/unlock icon as a CCImage:
|
1 |
CCImage* icon = element->getIcon(); |
Currently supported APIs are:
|
1 2 3 4 5 6 7 8 9 10 11 12 13 14 15 16 17 |
class CCGreeAchievement : public CCObject { public: static void loadAchievements(int index, int count); CCString *getId(); CCString *getName(); CCString *getDescription(); int getScore(); bool isUnlocked(); bool isSecret(); bool loadThumbnail(); // async CCImage *getIcon(); void unlock(); // async void lock(); // async } |
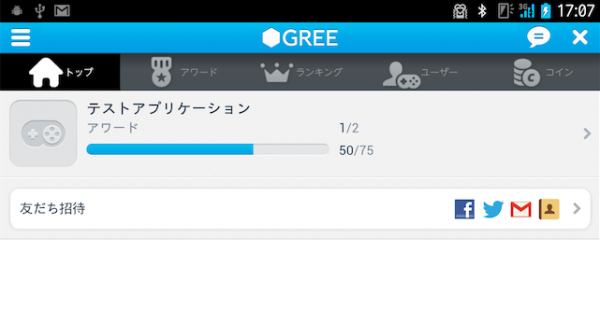
Dashboard API
To launch Dashboard, simply use:
|
1 2 |
CCGreeDashboard::launch() CCGreeDashboard::launch(int type, CCDictionary *params) |
Leaderboard API
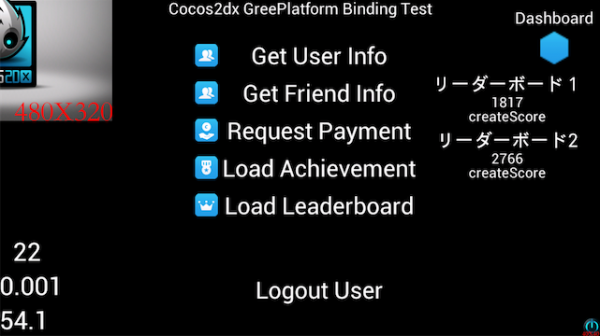
You can load the Leaderboard list, and get information on each item in the list:
|
1 2 3 4 5 6 7 8 9 10 11 12 |
{ //Load Leaderboard CCGreePlatform::setLeaderboardDelegate(this); CCGreeLeaderboard::loadLeaderboards(1, 10); } //callback void HelloWorld::loadLeaderboardsSuccess(int index, int count, CCArray *leaderboardArray){ CCGreeLeaderboard *board = dynamic_cast<CCGreeLeaderboard *>(leaderboardArray->objectAtIndex(1)); CCString *id = board->getId(); CCString *name = board->getName(); CCString *url = board->getThumbnailUrl(); } |
Also you can set the score for each leaderboard you loaded:
|
1 |
board->createScore(10000); |
Dialogs(InviteDialog, RequestDialog, ShareDialog)
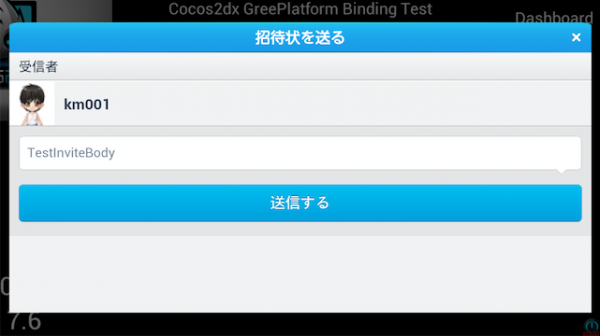
You can create and display dialogs with this library. Below is an example that shows how to display an InviteDialog. Pass parameters as CCDictionary, as how you would do normally with cocos2dx.
|
1 2 3 4 5 6 |
CCGreeInviteDialog *dialog = CCGreeInviteDialog::create(); CCDictionary *dict = CCDictionary::create(); dict->setObject(new CCString(xxxxxxxxxx), GD_INVITE_DIALOG_PARAM_KEY_TOUSERID); dict->setObject(new CCString(xxxxxxxxxx), GD_INVITE_DIALOG_PARAM_KEY_BODY); dialog->setParams(dict); dialog->show(); |

